Chicken Pot Pie

Happy New Year everyone! As the holiday season ends its time to start thinking about getting back to reality! My swift kick of reality hit me this morning when I realized I needed to make food for myself for the upcoming work week. While I was cooking for myself, I also decided to make some food for my grandparents. For the past year or so I’ve been making my grandparents freezer meals because they aren’t as able to prepare meals as they once were. Today I made them chicken pot pie! This has become a staple that I make sure they have in their freezer all the time! Preparing the meal is a little labour intensive, especially if your knife skills are as bad as mine, but I guarntee its worth it in the end! I made a large batch today which has given me 3 pans of chicken pot pie (20ish servings). If you don’t want so much, I recommend halving the recipe!

Ingredients

8 boneless, skinless chicken breasts

1 quart of vegetable broth (poaching liquid)

1 bunch of celery (finely diced)

4 large carrots (finely diced)

3 medium onlions (finely diced)

2 large yams (finely diced)

2 cartons of low sodium chicken broth

8 tbsp whole wheat flour

8 tbsp butter or margarine

2 tbsp thyme (dried) (use more if you use fresh)

3 tbsp za’atar seasoning mix *see note below about this seasoning*

1 tbsp celery seed (not celery salt!)

2 slices of thick cut double smoked bacon

2 packages of tendercrisp puff pastry

salt and pepper to taste

1/2 cup milk

This slideshow requires JavaScript.

Method 1. Poach the chicken breasts in vegetable broth. This will take approximately 15 – 20 minutes.

** Note, if you’ve never poached chicken before it is a cooking method that I highly recommend, especially if you’re re-heating the chicken later. Poaching is a very healthy way to cook meat, as it renders and separates most of the fat, and leaves the meat incredibly juicy. I wouldn’t recommend using the broth afterwards. If you need to make sure you take out all of the fat and oils left from the chicken.

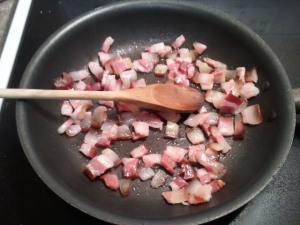
2. While the chicken is poaching fry the bacon on low. You’re bacon won’t burn, or taste over done if you cook it on low. For bacon lovers its hard (I know!!) to wait for bacon to cook, but the results speak for themselves!
3. In a soup pot cook the vegetables with 1 tbsp of olive oil. Continuiously stir the vegetables, as you don’t want any to burn on the bottom.

4. Once the vegetables are mostly cooked through add the cooked chicken (diced), and the bacon. Stir and add both cartons of chicken broth.

5. While everything in the pot comes to a boil make a roux. To make a roux add the butter and flour into a saucepan and cook on med-high until the butter has melted and the flour has begun to cook. This usually takes about 2-3 minutes. Once the roux has cooked add it to the soup pot and mix with a whisk vigorously.

6. Mix in 1/2 of milk once the mixture in the soup pot has thicked.

7. Once the mixutre has thicked portion equally into pyrex dishes. Leave 1.5 inches from the top of the pyrex.

8. Let the mixture cool a bit in the pyrex dish before putting on the puff pastry. While the mixture is cooling roll out the puff pastry to fit 1 inch over the pyrex dish. Once the mixture is room temperature put the puff pastry over top.

To Cook

Take out of freezer and bake for 75 minutes at 375 degrees. If you like, brush 1 large egg (well whisked), over top to make golden brown.

Notes:

1. Za’tar is a great thyme seasoning mix from Palestine. Check the hyperlink for more information. In Canada it can be purchased at Ten Thousand Villages locations for $6. Its well worth the money if you can find it!

2. Potatoes vs Yams. Traditionally potatoes are the starch in chicken pot pie. I have to say, I need a break from the traditional potato. Potatoes are very starchy, and are more for texture than for flavor. Yams or Sweet Potatoes have less starch and more flavor, they’re also better for your belt buckles.

3. To pea or not to pea?! Frozen peas are boring in my opinion! Why not add sweetness from the yams?

Hope you enjoy everybody!!

This slideshow requires JavaScript.

Goat Cheese Stuffed Chicken with a Roasted Tomato Sauce

While on holidays in my hometown of Maple Ridge BC, I decided to make a home cooked meal for me and my dad. Surprisingly this  meal only cost $14.00 for 2 people (most ingredients were purchased). Before delving into the process, method and other recipe like jargon I have been asked by my dad to report that this was a “DELICIOUS MEAL!!”, and that everyone who sees this will enjoy it thoroughly!

Goat Cheese Stuffed Chicken

Ingredients:

1 small “log” of herbed goat cheese

2 chicken breasts

salt and pepper to taste

Method:

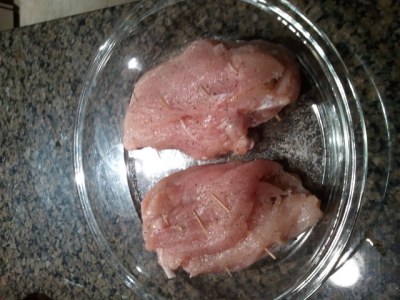
Butterfly your two chicken breasts open. Put in 3 slices of herbed goat cheese in the middle of each chicken breast, and close with toothpicks. Season the outside with Salt and pepper. Bake in the oven at 400 for 30 minutes (or until it is no longer pink)

Roasted Tomato Sauce

Ingredients:

10 (ish) cherry tomatoes

1 tsp olive oil

salt and pepper to taste

1/2 tbsp red wine vinegar

rest of herbed goat cheese (leave 1 1/4 inch slice to garnish)

Method:

Put the cherry tomatoes in a baking dish with olive oil and salt and pepper. Put under the broiler until they begin to pop (approximately 10 minutes). Once the tomatoes have “popped”, but in a frying pan on the stove and add the remaining ingredients. Cook on Medium – Low until the rest of the meal is ready. Stir occasionally.


As a side dish to the chicken I had the following:

Brussel Sprout Leaves cooked in Bacon

Ingredients:

1lb of fresh brussel sprouts

5 – 6 slices of deli bacon (not the pre-packaged stuff!, its too salty and too fatty!) – diced

1 medium onion dicd

4 garlic cloves crushed

salt and pepper to taste

1 tupperware full of water with 1/2 lemon work of lemon juice in lemon in it

Method:

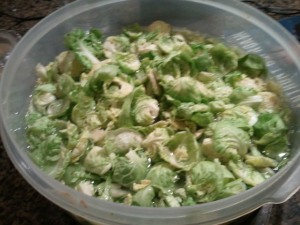
Peel the outer leaves of the brussel sprouts and discard. Peel the rest and put into water. If all of the leaves don’t peel slice thinly and put the sprouts into the water. This will stop the sprouts from browning.

While the brussel sprouts are in the water cook the bacon, onions and garlic in a frying pan on medium – high. *Do not cook on high! Your bacon will burn!*

After the bacon has cooked add in the brussel sprouts and cook on medium high and cook until the brussel sprouts are soft (approx 15 minutes).


Broiled Red and Orange Peppers

Ingredients:

2 peppers (1 red and 1 orange) – big chunks

1/2 tbsp olive oil

salt and pepper to taste

Method:

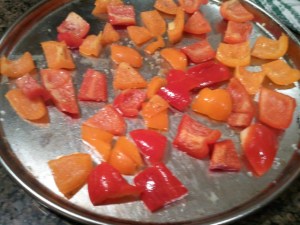
Mix all together and broil until brown on skin (approximately 10 minutes).

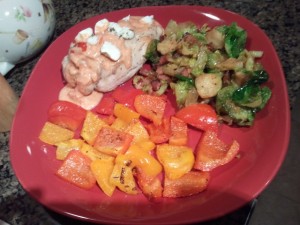
Here’s the finished product!

This slideshow requires JavaScript.

Crockpot Chicken

The crockpot, a cooking tool that I have many feelings about, both positive and negative. Recently I’ve been using my crockpot more on weekends so I can have a good meal, but not feel like I’m slaving in the kitchen all day. The one bonus that Crockpots give cooks, is you can cook food from frozen to hot without needing to worry about thawing time. Today I decided to make an ‘asian style’ chicken in the crockpot.

Looks like a lot, but they work together very well!

You will need:

6-8 bone-in chicken breasts

2 tbsp vegetable hoisin sauce (has less salt)

2 tbsp oyster sauce

1 tbsp soya sauce (low sodium please!)

2 tbsp agave syrup (replace with honey if you don’t have agave)

1.5 tbsp sriracha sauce

1/2 tbsp seasame oil

2 tbsp szechuan peppercorns (crushed in mortor and pestle)

5 cardomen pods (cracked, but left whole)

1 tbsp lemongrass seasoning (if you can’t find use lemon juice, zest, or broken lemon grass)

2 tbsp moroccon seasoning

2 tbsp minced ginger

salt and pepper to taste

1/5 – 3/4 carton of low sodium chicken broth

Method

This is easy, maybe too easy! Mix all of the ingredients, aside from the chicken in a bowl. Once everything is mixed, put the chicken in the crockpot, and pour the marinade over top. Let cook in the crockpot on high for 5 hours (from frozen).

This slideshow requires JavaScript.

The chicken ends up coming right off the bone. Its more like a pulled pork consistency, than cooked chicken. If you don’t like this, then I recommend lessening your cooking time, and cooking your chicken from raw vs. frozen.

Also, I don’t recommend using the leftover juices to make any sauce. The downside to cooking food in a crockpot is it renders a lot of fat. Your food in the end is healthier, but it will be virtually impossible to make a sauce that isn’t too oily. When I poured the leftover juices in a bowl, over half of the juices were oil and fat.

Might not look great but it tastes fantastic!

To go along with the chicken I made a potato dish.

Curried Potato Cake

3 potatoes shredded

2 eggs

salt and pepper to taste

2 tbsp curry powder

How to:

Mix the above in a bowl. Make sure that the curry powder is coating all of the potatoes. Put the potatoes in a hot frying pan with 1 tbsp olive oil. Let cook in stove top until the base is golden brown. Once the base is golden brown flip over. I used a plate to do this, I don’t have the finesse to flip in the pan. Finish cooking for 20 minutes in a 400 degree oven. When cooked, cut in cake like pieces. If the curry makes the potatoes too spicy, serve with plain yogurt or sour cream.

This slideshow requires JavaScript.

Notes and Substitutions

1. Agave Syrup is an popular new sweetner. I find that I prefer the taste and consistency to honey. Agave is healthier for you, but more importantly it doesn’t have the same harshly sweet taste. Agave is harder to find, and therefore honey is still a great option if you don’t have or can’t find agave.

2. Some of the seasonings and pairings that I used might not work for people who don’t like their food with too many spices. If you want it less spicy, I suggest taking out the cardomen, as it has a very distinct flavor, and halfing the szechuan peppercorns, again because their flavor is very distinct.

Quick and Delicious Pasta

On a Friday night I never want to spend a lot of time in kitchen cooking dinner. I want something fast, inexpensive, and delicious. Today on my way home from work I was inspired to cook something comforting. This is what I came up with.

Pesto Alfredo Pasta

You’ll Need

1 small carton of fresh alfredo sauce

1 small jar of pesto

1 lb of pasta (any is fine, I used Rigatoni)

2 red peppers diced

1 medium onion diced

2 italian sausages (raw, taken out of casing)

1/2 cup parmesan cheese

How to make it:

Start by putting sausage, peppers, and onions in a pan and cooking on med-high until the sausage is cooked through. **Note that the sausage will stick together if you don’t mix it well throughout the cooking process. Once everything is cooked drain, as sausage can be quite fatty. Add in the alfredo sauce and pesto to the pan. Mix well together and simmer on low. While the sauce is simmering par-cook the pasta. You want the pasta to be still chewy because it will be baked. Once the pasta is par-cooked put the pasta in an oven safe dish and mix with the sauce. Top with parmesan cheese and broil until the cheese browns.

This slideshow requires JavaScript.

Substitutions and Notes:

1. Pesto can be very strongly flavoured. Take a whiff of the pesto. If it smells like it will be too rich, add less. The idea of the pesto is to spruce up typical alfredo

2. Alfredo sauce can be substituted with any store bought sauce. Ideally homemade sauce tastes better, and is healthier, but this is a Friday night meal, not a Monday night meal.

3. If sausage isn’t your thing diced chicken works well. When I mix chicken in my pasta I like to cook it separatly from the veggies just to make sure its food safe.

4. If sausage is your thing, try different kinds, but make sure the seasonings in the sausage don’t counteract with the sauce and pasta. For example, lamb and fennel sausages might not pair well.

Sweet Potato and Chorizo Soup

Cold weather makes people crave warm, filling comfort food. The problem with comfort food is it leaves us feeling rather uncomfortable later! Here is a delicious recipe adapted from Jamie Oliver’s Cookbook – Jamie’s Food Revolution.

You will need:

2 carrots roughly chopped

2 medium onions roughly chopped

2 celery stalks roughly chopped

4 sweet potatoes roughly chopped

1.5 links of chorizo sausage (hot or mild) cut into slices *I typically get one of each

.5 links of chorizo sausage – cubed or cut into thin rounds

1 1/2 cartons of chicken broth (low sodium)

2 – 3 tbsp curry powder (depending on your taste)

1 – 2 tsp chipotle powder

salt and pepper to taste

Method

Put chopped vegetables, and chorizo (not the cubed chorizo!) into a large pot and let cook down on medium high for 10 – 15 minutes. After the vegetables ave softened add in chicken broth, curry powder, chipotle powder and salt and pepper. Let simmer on stove for at least 30 minutes. Once everything has cooked through run an immersion blender through the soup until smooth. Once the soup is smooth put in the remaining chorizo sausage!

Notes and Substitutions

1. Sweet potatoes and Yams are very close in taste and in this recipe I feel they can be interchanged. If you are going to use yams instead of sweet potatoes your soup will be oranger in hue and may taste slightly sweeter.

2. Chorizo Sausage can be purchased uncooked and smoked. Typically I buy smoked chorizo, as I prefer the taste and find that cooked chorizo renders less fat while it is heating through. If you want to use uncooked chorizo I suggest cooking the chorizo through before to avoid the extra fat in your dish.

3. If you don’t have chicken broth you can substitute vegetable broth. In my experience with vegetable broth I find it needs more seasoning than when chicken broth is used.

4. Chipotle and curry can not only be aquired tastes but they can also be spicy! If the soup is too spicy for all people who will be enjoying, serve with some plain yogurt, or sour cream to lessen the blow of the spices

Roasted Pork Shoulder

Lets face it, being a meat eater is pricey! In order for me to get my meat fix and stay on a budget I’ve had to teach myself how to cook, and how to eat different and cheaper cuts of meat. Some of the cheaper cuts include ground beef (not lean or extra lean unfortunately), stewing beef, and stir fry cut beef, and most pork products. The other day while at the grocery store I came across a cheap cut of pork, the pork shoulder. For those who have never cooked a pork shoulder, it can seem rather daunting. It looks foreign, and scary, but ended up being delicious! The whole pork should cost $4.00, and will feed me and my sister our protein for the week.

This is a pork shoulder. If you buy it, try to get bone in!

After doing some research in various cookbooks and online this is a recipe I came up with for pulled pork. It ended up being delicious and easy to create!

Ingredients:

1 pork shoulder ( 4 lbs roughly)

750ml Chicken Stock (low sodium)

1/4 cup apple cider vinegar (if you don’t have apple cider vinegar you can substitute with 1/8 cup of juice {apple or orange preferred} and 1/8 cup of white or malt vinegar)

2 cans of tomato paste

1 tbsp crushed garlic

1 tbsp crushed ginger

1.5 tbsp soy sauce (low sodium)

1/4 cup vegetable hoisin sauce (vegetable hoisin has less salt!)

1 tsp cayenne

1 tbsp chili powder

1 tbsp szechuan peppercorns (whole)

sea salt and pepper to taste


Method

1. Using a sharp knife score the pork shoulder. This will ensure that the maximum amount of fat is rendered.

2. Rub the scored skin with salt and pepper

3. Sear the skin in a hot pan until browned.

4. While the skin is searing put the rest of the ingredients into a crockpot and put on the high setting.

5. After the skin has been browned, put the whole pork shoulder, skin side up, in the crock pot.


The pork shoulder will take at least 6 hours to cook. This is the perfect recipe to “set and forget”. At hour 5 you will need to start rendering the fat from the top of the crock pot. Unfortunately pork shoulder is not a lean meat, but if you let it cook long enough and if you are intentional about removing the fat, the finished product is lean!

Once the meat is cooked, take out, and it should fall off the bone. If it doesn’t give it another hour or so in the crock pot.

Put the pulled pork (pulled with a fork) in a tupperware. If you want extra flavor add in a bit of the cooking liquids (with the fat taken out), and a small amount of BBQ sauce if you want extra flavor.

This is a great dish on its own, or with a bun and some coleslaw!


A New Take on Tacos

Taco night is a typical night for many populations: families, bachelors, university students etc etc etc. Its filling, cost effective and most importantly delicious. Recently I’ve been choosing a diet with higher protein, and therefore have been looking for options to make my favourite dishes higher in protein. Here’s a recipe that I’ve been using for about a year now. Its super flexible, and makes enough for 4 servings, plus leftovers!

You’ll need:

1lb of extra lean ground beef

1 red pepper cubed

1 medium white onion cubed

1 can of black olives (optional)

1 can of refried beans (look for the black refried beans!)

pickled jalepenos (to your taste)

3-4 tbsps of taco mix (see below for instructions)

1 can tomato paste

salsa to taste

Corn or wheat tortillas (soft or hard)


Taco Mix

Mix together 1tbsp of the following:

Cumin

Paprika (plain, not smoked or spicy)

Chili Powder

Black Pepper

1/2 tbsp of the following

Cayenne, or Chipotle

Sea Salt

(This will make more than the recipe needs, but saves really well)


Method

In a frying pan saute onions and peppers for 5 minutes, or until soft. When the veggies are soft add the ground beef. Drain liquids from the pan once the meat is fully cooked and add the taco seasoning. You want to over season your meat, onions and peppers because you will be adding other ingredients after. Once the seasonings are fully mixed in add the refried beans, olives, jalepenos, tomato paste and salsa. Heat through and serve on a tortilla.


Notes and Tips

The consistency of this taco mix is different and much more filling than your typical box mix. Don’t be alarmed if its significantly thicker, you’re making it correctly if it is thick!

Tip #1 – I hate all of the fat that is rendered from cooking ground beef. One thing I do in order to take away as much fat as possible is drain the meat in a colander in my sink. This helps get everything off, it also makes seasoning the meat a lot easier later on, because your meat will have its true flavor.

Tip #2 – If you’re not a fan of refried beans, but want to increase your protein add black beans. Before adding them to your pan, but them in a bowl and mash them up a bit. You may need to season your tacos more if you are adding black beans as they have not been previously cooked. Black beans are the best beans to have if you are increasing your protein, they’re full in protein as well as fibre. Basically they’re a super bean!

Tip #3 – If you want to be more authentic, head to the grocery store and pick up some masa to make home made corn tortillas. When I grant myself the time I do this when making tacos. Corn tortillas have fewer carbohydrates, making them healthier, but more importantly, they taste great! The process to make the corn tortillas is a bit labor intensive, it takes a while to make each tortilla, and then cook them on the stove top. Unfortunately I haven’t found a fast solution for this yet.

Tip #4 – Watching your sodium? Take out the olives, and use fresh jalepeno’s instead of pickled. Also, use no-salt salt flavoring, or sea salt, both have lower sodium rates than typical table salt. Personally I prefer the taste of sea salt when cooking.


Enjoy!

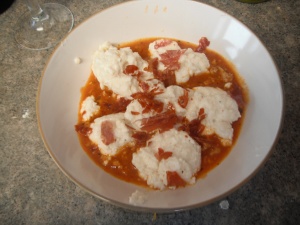
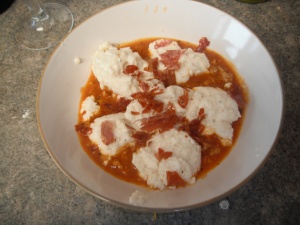
Ricotta Gnocchi in a Tomato Sauce with Crispy Prosciutto.

Ricotti Gnocchi in Tomato Sauce with Crispy Prociutto

This was a true culinary challenge for me, but it ended up being completely worth it in the end! Gnocchi is traditionally a pasta dumpling made out of potatoes but ricotta cheese has a similar texture to cooked potatoes, and therefore works well as a substitute. This pasta dish ended up tasting a lot like traditional lasagne, all that it was lacking was the pasta, which I didn’t miss at all!

You’ll Need:

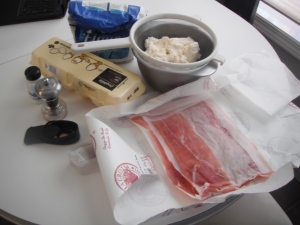
Prociutto (thinly sliced), Ricotta (drained overnight), 2 eggs, flour, S&P and freshly ground nutmeg

1 container of fresh ricotta cheese (it should weigh approx 1.5 lbs)

2 eggs

1/4 – 1/2 cup flour

Salt and Pepper to taste

1/4 tsp freshly ground nutmeg

6 slices prosciutto

1 jar pre-made pasta sauce (tomato based)

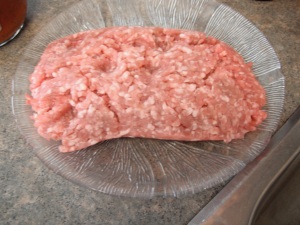
1 lb ground pork

Ground Pork

For the Sauce:

In a saucepan cook your ground pork in 1 tbsp of olive oil. While cooking your pork make sure to stir often to stop your meat from clumping. Also, make sure to season your pork before adding the sauce. When the pork is just cooked add your tomato sauce and let simmer for atleast 1 hour. This will enhance your flavor, and will make the pork taste like it was a part of the sauce from the get-go.

For the gnocchi:

1. Open your ricotta, and put into a fine strainer over a bowl. Cover with plastic wrap and let drain for 8 hours to over night. This will remove any excess milk and liquids in the ricotta which will help the dough form better.

2. After the ricotta has drained place in a bowl, add in eggs (already beaten), salt and pepper, nutmeg and flour. Add the flour slowly as you do not want to have a dough that is too hard. It is easier to make a dough harder then to soften it. Your dough will be just a bit firmer than muffin dough when everything has mixed.

3. Bring a pasta pot with salted water to a boil.

4. When the water is boiling begin to make your gnocchi. This is done by taking a tablespoon of gnocchi and forming an oval by rounding it out with a second spoon. This technique takes more finesse than I was expecting, therefore I recommend practicing this while the water is boiling.

5. As soon as you have shaped your gnocchi, drop into the water. When the gnocchi rises it is fully cooked. Remove from water and place in serving dish.

For the crispy prosciutto

1. Pre-heat your oven to 400

2. place your prosciutto on a baking sheet

3. bake your prosciutto until it darkens in color.

4. when cooked crumble and serve as a garnish.

To plate:

Spoon a few tablespoons of sauce in the bottom of the bowl and gently place the ricotta on top. After the gnocchi is placed sprinkle the prosciutto on top!

Enjoy this dish!

C'est Finit!!

Peanut Butter Cookies

Loosen your belt buckles and buy some milk if you’re going to make my Peanut Butter Cookies! I load my peanut butter cookies with chocolate chips, butterscotch chips and chocolate chunks! The best part about this recipe is the dough is simple to put together, and there are tons of varieties you can create with all of the chocolate chips choices at the grocery store!

You’ll Need:

1 cup of butter or margarine

1 cup peanut butter (smooth)

1 cup white sugar

1 cup brown sugar *try demera! Its darker and leaves a bit of a sweet crunch!*

2 eggs

2 1/2 cups white flour

1 tsp baking powder

1 1/2 tsp baking soda

1/2 tsp salt

2 cups of chocolate chips (i usually do 1/2 cup of 4 varieties)

Method:

1. Preheat your oven to 375

2. Cream butter, sugar, peanut butter, sugar and eggs together

3. blend in flour baking powder, baking soda, and salt

4. stir in chips. Today I added 1/2 cup milk chocolate chips, 1/2 cup butterscotch chips, 1/2 cup skor chips, and 1/2 cup of dark chocolate chunks! I like to pour the chips into a tupperware and mix so every cookie has an even mix of all of the chips!

5. Spoon 1 tablespoon of the dough and flatten onto a baking sheet with a fork

6. bake in the oven for 8-10 minutes.

Makes about 6 dozen!

Milk Chocolate Chips, Butterscotch Chips, Skor Chips and Dark Chocolate Chips.

The mixed dough! Makes a lot!

Make sure you let the cookies cool well before transferring them. The chips need to cool otherwise the cookie will fall apart.

Enjoy everyone!

The Best Pork Tenderloin

This past weekend I decide to experiment a bit in the kitchen and make an incredible pork tenderloin. After watching many many cooking shows I chose to try glazing the meat. The end result was a soy and hoisen marinated pork tenderloin with a spiced plum glaze on top! It was delicious and very robust in flavor!

Plum Glaze

I started with a plum sauce that I made a week ago. To make this boil plums with 1 cup of sugar and 1/2 cup of water. I kept the skins on to heighten the color, as well as balance the sweetness of the plums. After the mixture boiled I added a few tablespoons of cornstarch. After I had my desired thickness I strained the sauce and got rid of the skins.

You’ll need:

1/4 – 1/2 cup of Plum Sauce (plum jam would be a fine substitute)

1 tsp ground schezwan peppercorns

1/2 tsp Asian 5-Spice

1/4 tsp salt

Method:

In a sauce pan mix all of the above ingredients and heat on medium high until it begins to boil. When the mixture begins to boil immediately turn to low and let simmer for atleast 15 minutes. Make sure to stir periodically as there is a high sugar content in the plum sauce.

If you can't find schezwan peppercorns, regular peppercorns will work, just add some orange zest.

Pork Tenderloin

This marinade is highly flavorful and would work well on its own. Make sure to use low-sodium soy sauce as it could over salt your pork otherwise.

You’ll need:

1 pork tenderloin (big enough to feed 3-4)

3-4 tablespoons of low-sodium soy sauce

2 tbsp hoisin sauce

1 tbsp chili sauce

1/2 tsp Asian 5-Spice

1 1/2 Tablespoons of honey

1 tbsp sesame oil

Method:

Mix all of the liquid ingredients into a large freezer bag. Make sure to mix well as the honey and hoisin are thicker than the other ingredients. When everything is mixed put the tenderloin into the bag, close the bag removing all or most of the air and let marinade in the fridge for 1.5 t 2 hours (no longer!).

After the pork is out the of marinade brown both sides in a frying pan (about 5 minutes per side). Once seared, pour 1 tbsp of the glaze on top of the pork tenderloin and put in the oven at 350 for 10 minutes. After 10 minutes flip the pork and glaze the other side. The pork should take approximately 20 minutes to cook. Throughout the cooking period I glazed each side twice.

When the pork is fully cooked take out and put in a cutting board and let rest for 10-15 minutes. After the pork has rested cut into medallions and serve the rest of the plum glaze as a sauce on the side.

This is before I put the glaze on. Once the glaze is on the pork becomes a great reddish-brown color! Its sweet and savoury all at the same time!

I served this dish with homemade mashed potatoes. If I can make any suggestions about the potatoes its to try mashing them in a potato ricer. It makes them so smooth!